Network and services system · Academic project
Doraemon
Design and implementation of a network topology and associated services for two fictitious companies in a virtualized environment.
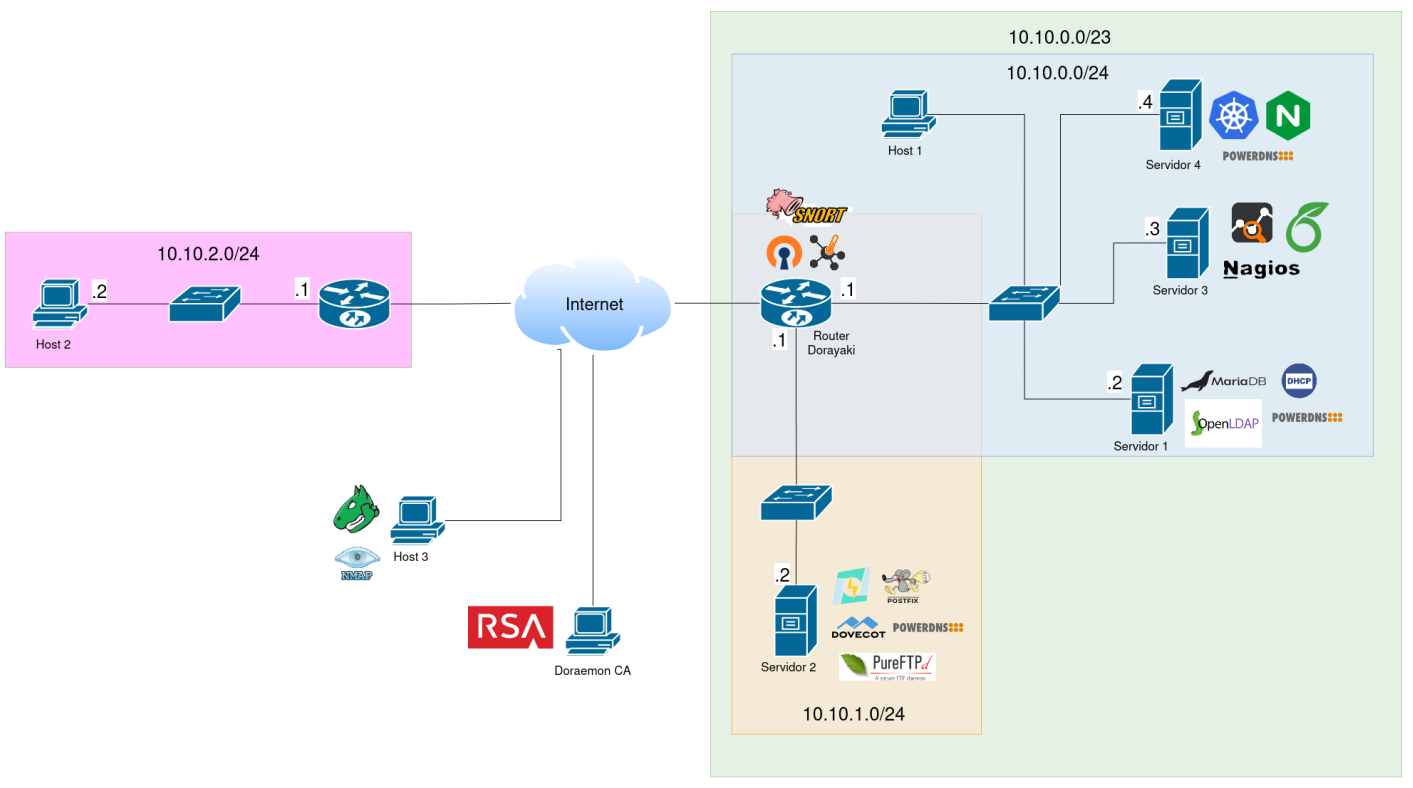
General diagram of the network and its services
About the project
This project is part of the final assessment for two courses in the computer engineering specialization of my degree. Even though it is a purely academic project, I felt it was worth including in this portfolio given the value I got out of learning all these tools during my studies.
The project consists of designing and deploying a network topology and the services related to two fictitious companies. Although the deployment was virtualized using VirtualBox, it had to be reproducible in a real environment with physical devices. Many of the deployed services were required in order to pass the assignment; however, there are also extra services and configurations that I added with the aim of learning new technologies and improving the services provided.
Below, I will go through the different services included in this project. Since there are many services and a detailed explanation would make this unnecessarily long, I will give a general overview of each group of services, describing their motivation and any points I find interesting. For a full specification, the documentation can be consulted.
Deployed services
Ntop/nProbe and Nagios
Network monitoring
To begin with, I would like to talk about the services aimed at monitoring the network. The goal of network monitoring is to ensure that all services are available and to keep track of how the network is behaving. Nagios and Ntop with nProbe were used for these tasks, respectively.
Nagios is a service deployed within the organization's internal network with the goal of verifying that all services are up and available. To do this, it is configured with which services exist and at which addresses they can be found. This way, Nagios can check their status and even send alerts when something goes down. This kind of service is vital for any organization, but even more so for one like this that will have public-facing services. Properly configured, it lets you keep thorough, centralized track of the state of your services.
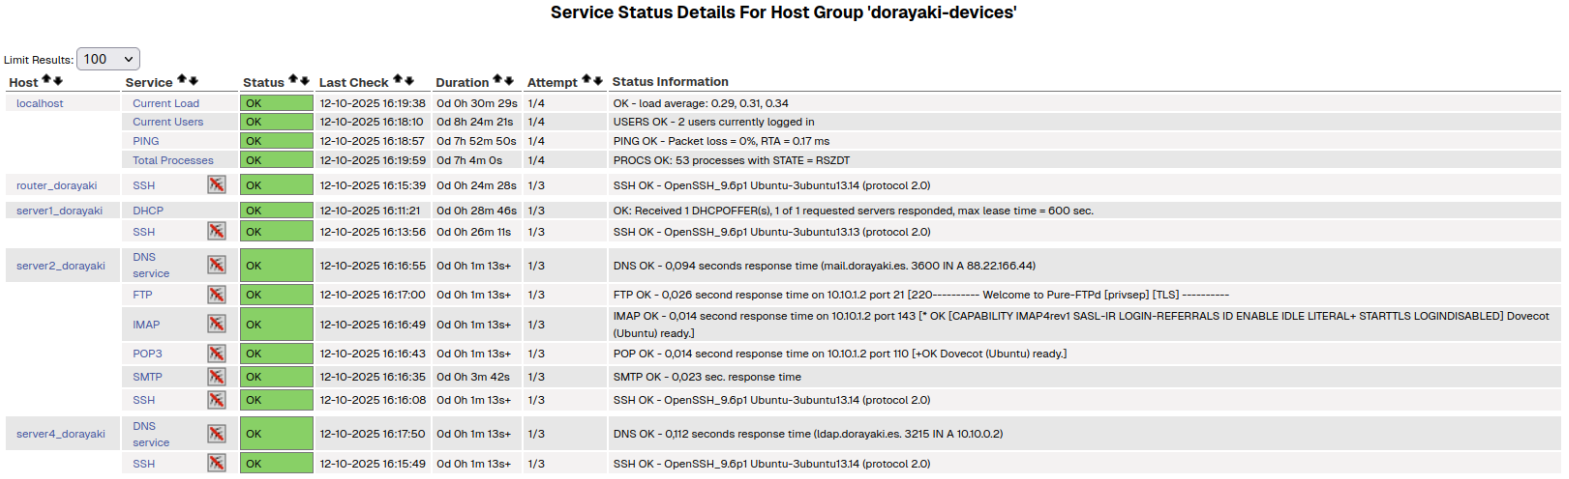
Nagios control panel
Ntop is a tool that analyzes incoming traffic through a device's interfaces. It is perfect for analyzing network usage and detecting congestion, inappropriate use, or even suspicious behavior indicating a possible attack. However, Ntop only analyzes the traces that pass through the device where it is installed. Therefore, to analyze the entire network, Ntop would need to be installed on a router, or all traffic would need to be routed through it. Although these options were feasible, I preferred a more distributed approach using nProbe.
nProbe is another tool made by the same company behind Ntop, and its job is to collect network data and send it to an Ntop server. This way, we can monitor the entire network by installing it inside the router. I felt this was the best option because it allows managing the whole network without installing a heavy service on the full Ntop instance. It also has the advantage that, if there is more than one site, the Ntop dashboard can be centralized so that data from all sites flows into the same Ntop server.
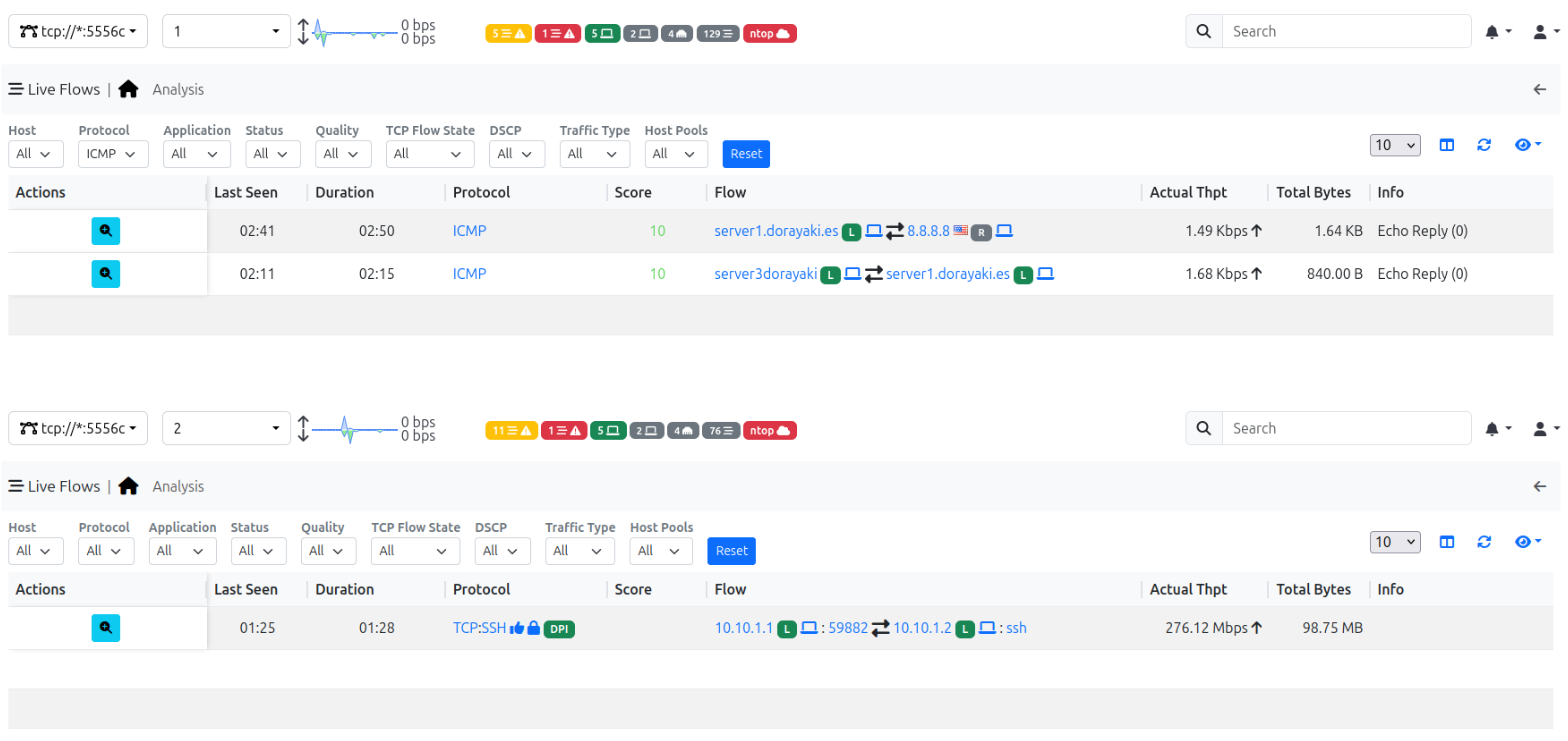
Ntop control panel
DHCP and PowerDNS
Private and public network management
Now I will explain an essential part of the network: DHCP and DNS. Both are essential services for a network, but the more interesting and complex of the two is DNS.
The idea behind having a DNS server is to allow service users to use domain names instead of having to remember device IPs. In addition, since the company provides public services, it is worth having a public DNS server for them. Both services were managed with PowerDNS, with the difference that the public DNS is managed through Cyberpanel. What is important to highlight is that both make use of a database to store the DNS records.
As the one interesting point worth analyzing, I want to look at the need for a self-hosted public DNS. In this case, a public DNS was deployed with Cyberpanel because the project required it. This has the advantage of giving you full control over the DNS server and its monitoring. However, in the vast majority of cases, it is better to use services like Cloudflare. These not only offer DNS server management with close to 100% uptime, but also provide protection against DDoS attacks and other security concerns without having to complicate the infrastructure. For this reason, it is often better to contract this kind of service for public DNS and deploy a simpler one for the private network.
OpenVPN and OpenLDAP
Access control
First, I would like to talk about the value an LDAP directory brings to a company. An LDAP directory allows a company to centralize the information of all employees and manage their authorization. This is what lets an email client autocomplete an address just from a name; it also allows checking whether certain employees have access to certain data or services, among other things. For this reason, I decided to deploy this service using OpenLDAP, since it would be very useful.
Being able to allow remote access for employees who cannot come into the office is essential for many companies. This requires a communication channel that allows secure remote access to a device. That is where OpenVPN comes in. This is a tool that allows a tunnel to be created to securely connect two devices. All that is needed is a trusted key known to the OpenVPN server. This tool was chosen over other very popular ones like Wireguard because OpenVPN makes it possible to simulate the remote device being physically on the same network. One drawback of OpenVPN is that, with a valid certificate, anyone could connect to the VPN. This is where the LDAP directory comes in.
The idea is simple: only authorized users can connect to the VPN. This way, when OpenVPN receives a connection request with a valid certificate, it checks whether that user has the appropriate authorization by querying the LDAP directory. That way, only users with permission will have their VPN access request accepted.
Cyberpanel
Centralized deployment of public services
This section is simple: a tool called Cyberpanel was used to deploy the public services. This tool allows the management and deployment of web, SMTP, IMAP, POP3, FTP servers, and many others in a simple, centralized way. It is true that all of these services could be set up separately with their corresponding tools (Apache, Dovecot, Postfix, FTPd...), but Cyberpanel provides simple, centralized management of them with little effort.
One thing that does deserve special mention is decoupling the database. Cyberpanel uses a database to store all its information, and by default it is installed on the same device. This would mean having a database inside a DMZ, which I consider a potential attack vector. For this reason, I decided to decouple the database and configure Cyberpanel to use a different database in another location, using the MariaDB instance on the private network.
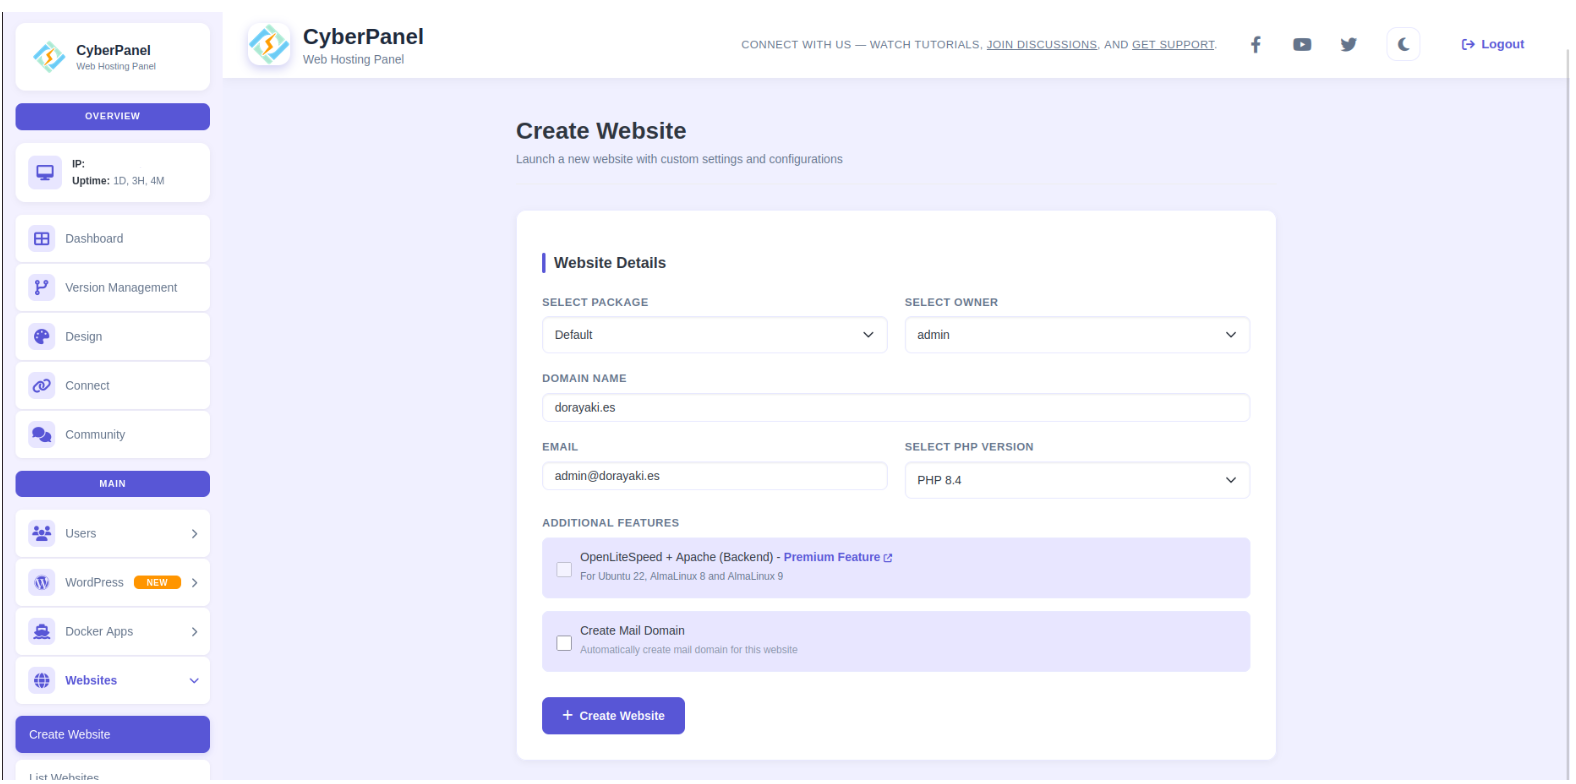
Cyberpanel control panel
Firewall, nmap, Snort, and Greenbone
Security auditing and analysis
Another very important aspect when building and administering a system is security. It is necessary to implement defensive mechanisms to protect the infrastructure and services from possible attackers, but it is also essential to design a security auditing plan to check for possible flaws.
Regarding the first point, the main defensive methods were a well-configured firewall and the deployment of Snort for intrusion detection. Proper firewall configuration is vital to a system's security, and here I carried out an in-depth analysis of each device to determine the minimum rules necessary for it to work. I also distinguished between stateless and stateful rules for more effective protection. Deploying Snort on the router seemed like a solid alert mechanism, since it comes with extensive community-created rule sets that capture well-known attack and intrusion patterns.
On the offensive side, I carried out a security audit using nmap and, above all, Greenbone/OpenVAS. The latter tool is widely used since it allows both perimeter and authorized analysis of different devices, generating alerts, generating reports, scheduling scans, and much more. In this project, only a perimeter and authorized analysis of the servers was carried out, due to lack of time and experience. Even so, this tool would have allowed for a much more robust audit plan to be built.
Kubernetes (K8s)
Deploying services with redundancy
Finally, a Kubernetes cluster was also deployed. This deployment was part of the project, so the use case itself is not the most relevant part. The assignment only required a simulated cluster using minikube, but I decided to use a full installation with kubeadm to make it more realistic. This way, I could bring out the real value of a K8s cluster. I also included the deployment of the K8s dashboard to manage the whole cluster more conveniently.
While working on this project, I wrote a complete guide on how to deploy different types of Kubernetes clusters. View guide on Notion ↗
One point worth highlighting is that, since the service deployed on K8s was a private Nginx server for the company, there was a need to share storage between replicas. Otherwise, depending on which pod responded, a different page would be served, and deploying new versions of the website would become more complicated. For this reason, a PV and a PVC were created to allow a connection to an NFS holding the web server's content. Likewise, to ensure a uniform configuration across all replicas, a ConfigMap was used for the Nginx configuration.
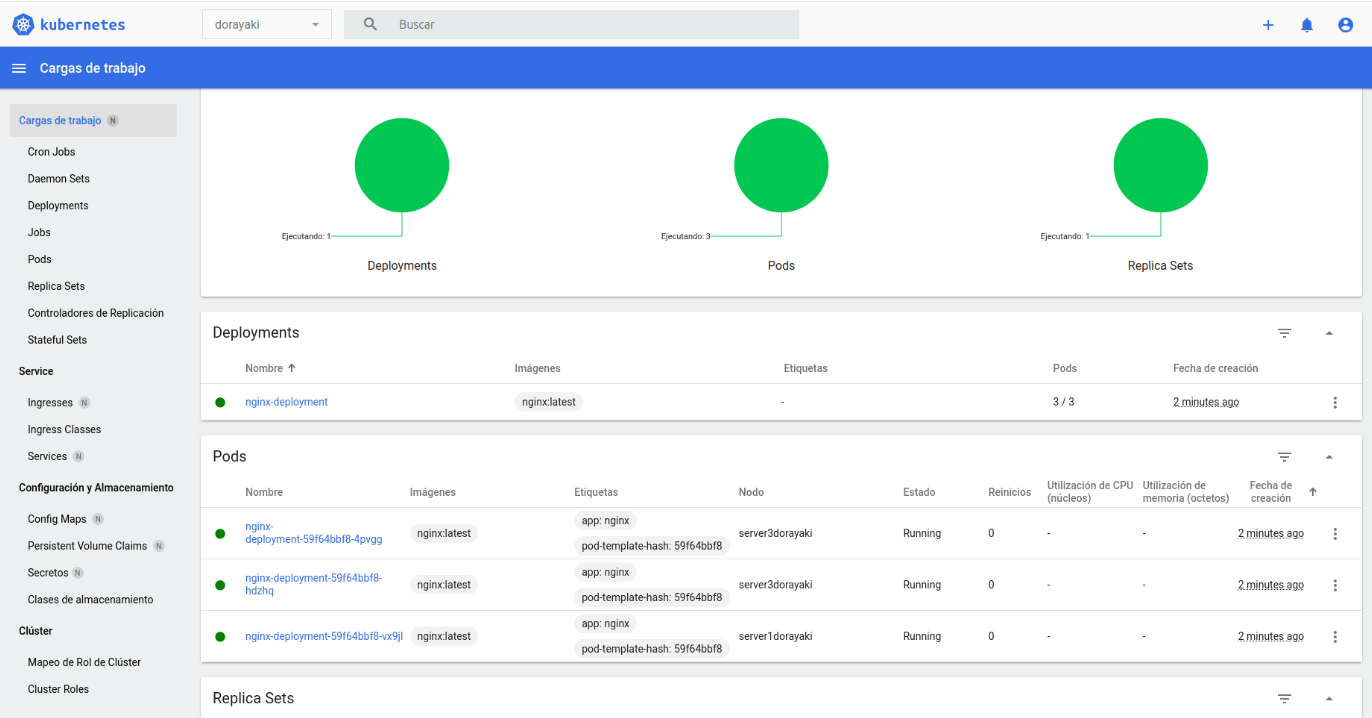
K8s control panel